Hypnocake
Some time ago I was enchanted by the idea of hypnocake. On Saturday my friend threw a cake themed party, which was the perfect time to try one out for myself! My good buddy James helped out, and I am happy to say that the results were spectacular!
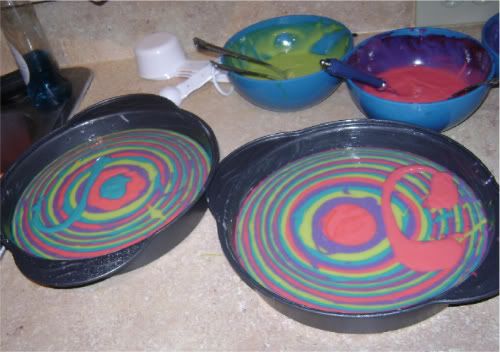
I used a recipe for zebra cake that a friend found. I'm not going to repeat it here, but if you are interested, the instructions on the site are pretty clear. Instead of dividing the batter in half and adding cocoa, I divided it into quarters and added food coloring for a rainbow effect. We wanted a larger cake, so we doubled the recipe and filled two pans, with each of us working to fill one.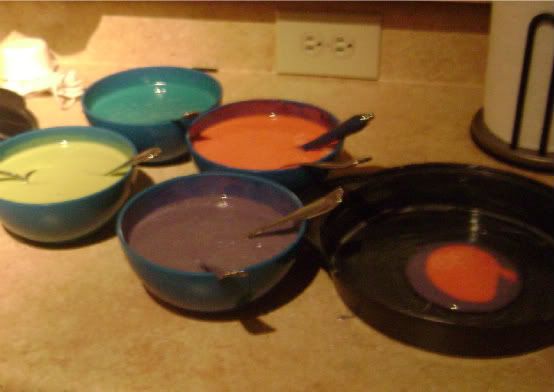
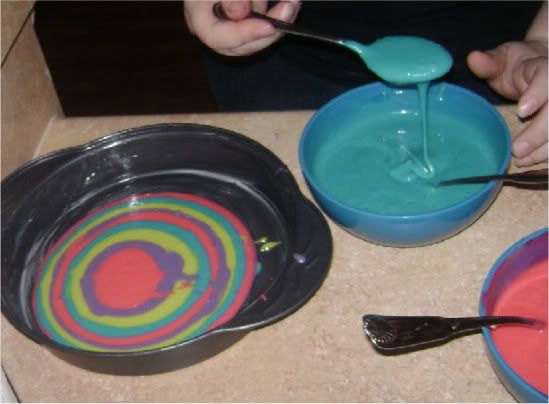
We used large spoons to scoop the batter and drip it into the center of the pan. I was really surprised that the method we used worked, but it did. Just continue to scoop and drip each color into the pan, and give it a second to spread. It will be shallow at first, but don't worry, it'll fill up. Also, be sure that you always aim for the center of the pan. When we first started, we aimed for the center of the last circle. We got a little further off each time, and soon our layers were way off center. Don't worry if you do get off, though. You can just make your next scoop in the center. Remember that people will only see slices of the cake, so if your layers are a little off no one will notice.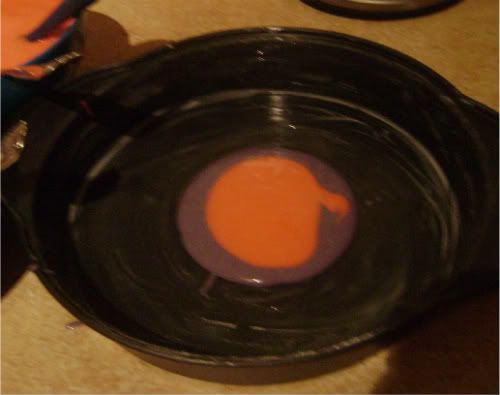
Once you're done, the batter should look something like this. For a bit of a personal touch, we each added our initials to the top of our batter.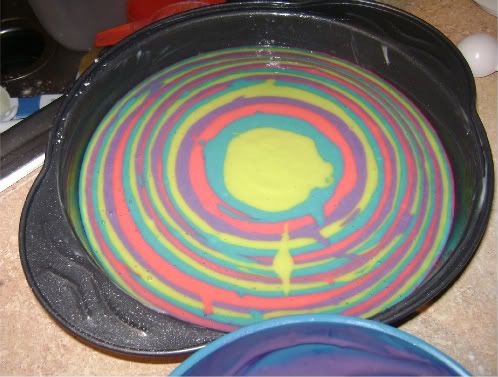
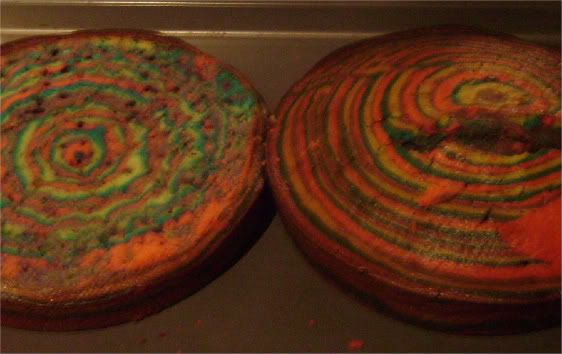
With the batter successfully poured, we popped both layers into the over and sat down for an episode of Top Gear. 40 minutes later, we had two beautiful cakes! We chopped the top off the bottom one for ease of construction.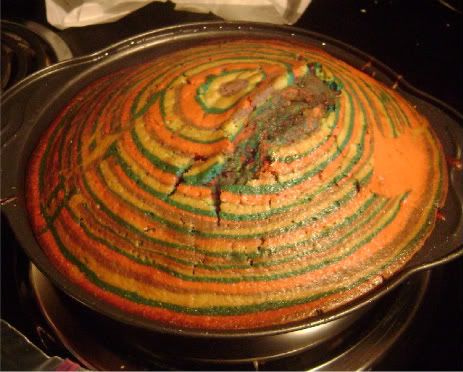
I originally planned to do a tie-dye effect with the icing. I pulled three small portions out and dyed them fancy colors, but that didn't leave enough white icing to cover the entire cake, so the effect didn't work. I ended up using the colored parts all over, so my cake just looked like a sugary color wheel.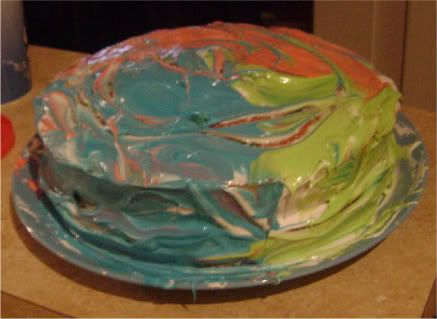
So we took the cake to the party and it was a huge hit! The inside turned out beautifully.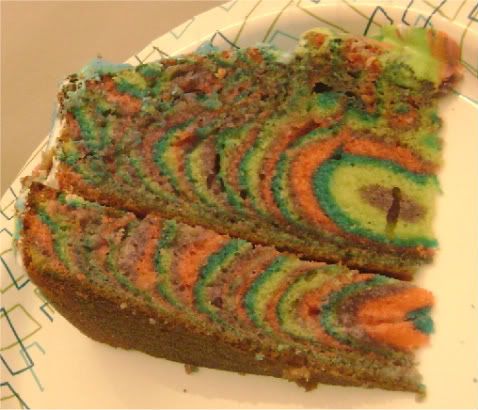
Next time, there are a few things we are going to try differently.
- Start earlier. We were pretty late to the party, because the recipe says that the scooping took 10-15 minutes. That was a lie. It took us around 70 minutes.
- Thicker layers. The layers were thicker in the original picture, and I think ours would look a lot more vibrant if they were wider. You can kind of tell in the picture that we made them larger towards the end. Scooping more in at a time, maybe 1/3 to 1/4 cup, should do it.
- Different batter. The batter we used wasn't particularly sweet, which was kind-of a bummer. Next time, we will probably go for a box batter. It will be thicker, but we are hoping that with thicker layers it will all work out.
- Better icing. I will buy more icing next time, and try my fancy tie-dye effect.
- Better construction. Instead of cutting the top off the cake, apparently I can turn it over and it will flatten out. Plus, more icing between the layers will keep them together.